
With the galaxy nail growing ever more popular and it being so simple to replicate I thought I would post a tutorial and help you all get the amazing nails you dream of.
I'll try to keep this simple.

Firstly start by painting your whole nail either black or dark navy. I have opted for Navy.

Seondly get yourself some sponge cut into small chunks and some tweezers to hold onto it with. These are the colours I chose to use. White, glittery purple, glittery turquoise, metallic grey. I didn't use the pink so ignore that one.

Using your sponge lightly pat some white polish in an S shape across your nail and leave to dry.

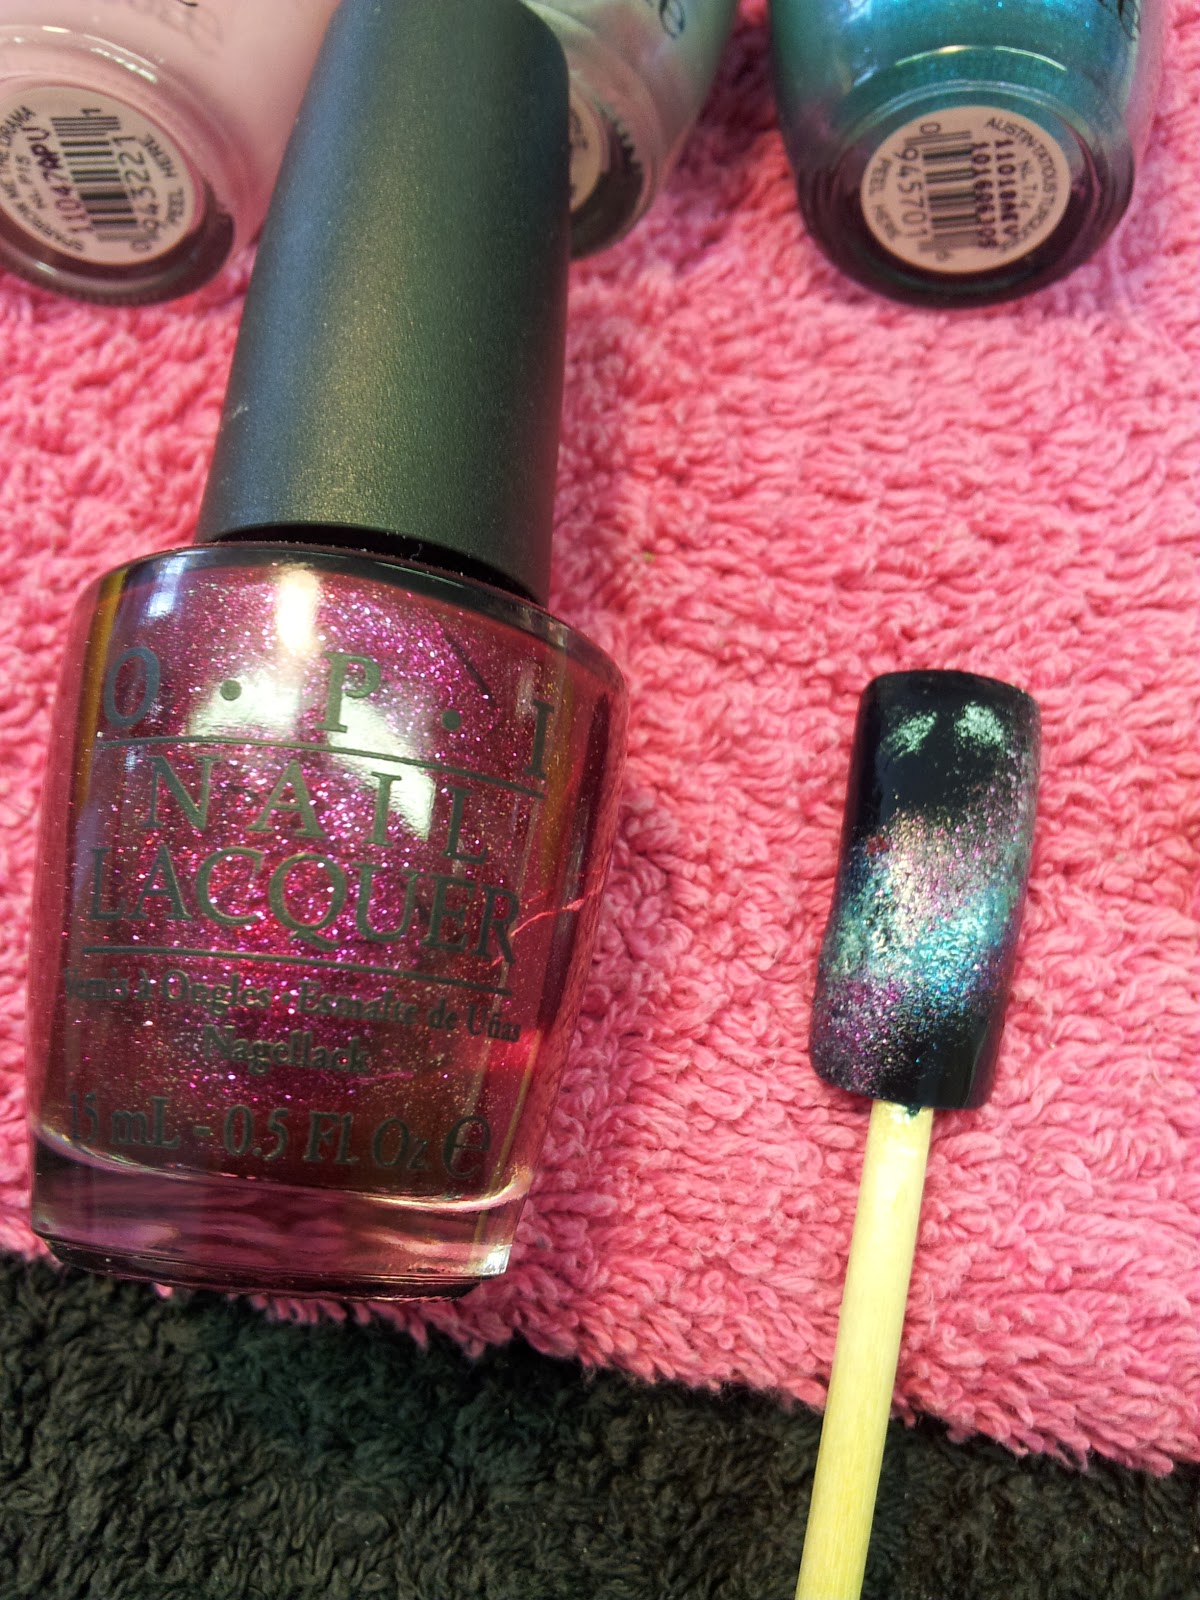
Using your metallic grey colour pat some grey through the middle and on the sides a little just to add depth to the nebula.
.jpg)
Now using your blue highlight some of the sides just like a real. Feel free to help yourself with pictures of nebulas if it helps!
Again as you can see I have added the metallic pink into the corners and in the middle. It is really starting to take shape now :-)

Nearly finished...Get your white again and with a cocktail or orange stick dab on dots of white in different sizes to be our shining stars.
After this is all dry add a light shimmer over the top to help create that space sparkle and topcoat.
Simple!!!!

I told you it was easy!
If you have a go send me yours!!!
Lots of Love Aimie xxx
Heyyy from your newest follower!
ReplyDeleteWooow! They look amazing! And so easy to do too =D I love OPI polishes. Simply the best.
Jen xx
Thanks babe!
ReplyDeleteOPI are my favorite to be honest. Can't be beat :-)
You will find I'm now your newest follower too, your blog looks extremely fun and entertaining xxxx